To add a Player to the Godot project, perform the following steps in order:
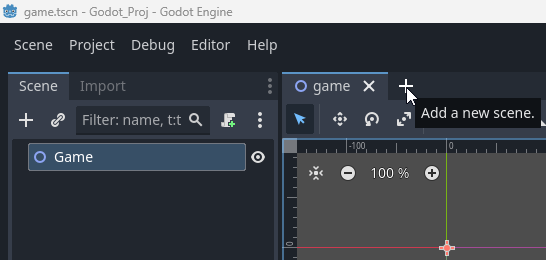
Create a new Scene by clicking the + sign on the right side of the Game tab.
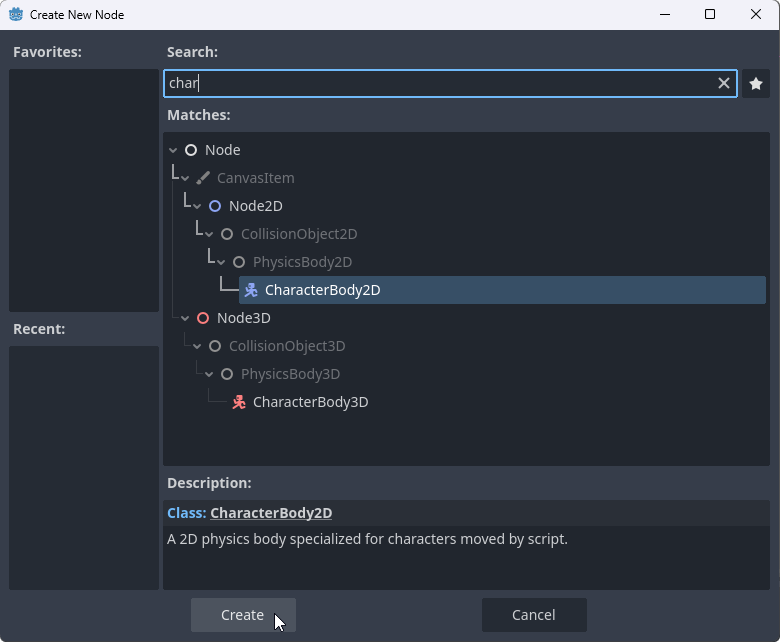
1.Create a new Node by clicking on the + sign under the Scene tab.
2. In the Create New Node window, search for CharacterBody2D in the Search line and select it, and click the Create button.
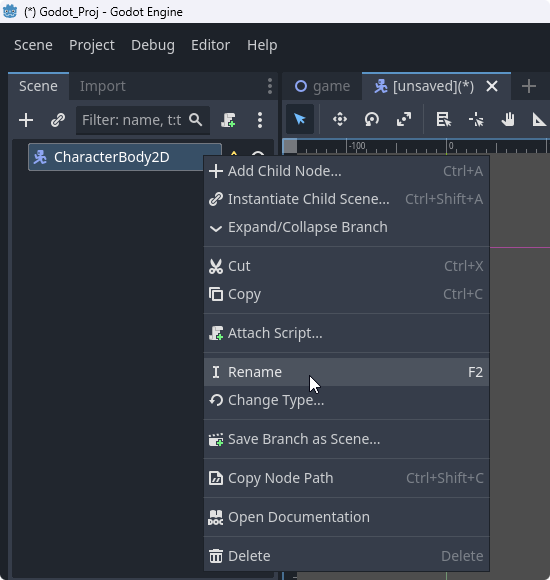
3. Change the name of CharacterBody2D to Player from the menu that opens when we right-click.
4. Save it as player.tscn file in the res://scenes directory in the window that opens with Ctrl-S.
Node is visible, but Player is not visible in the scene because there is no graphic.
1. To add graphic so the Player can be seen in the scene, create a new Node by clicking the + sign under the Scene tab or by pressing Ctrl-A.
2. In the Create New Node window, search for AnimatedSprite2D in the Search line, select it, and click the "Create" button.
3. While AnimatedSprite2D is selected, under the Animation section of the Inspector tab, select the New SpriteFrames option from the drop-down box on the right side of the Sprite Frames line.
4. A window opens at the bottom of the Godot IDE. Click on the Add frames from Sprite Sheet button in the window.
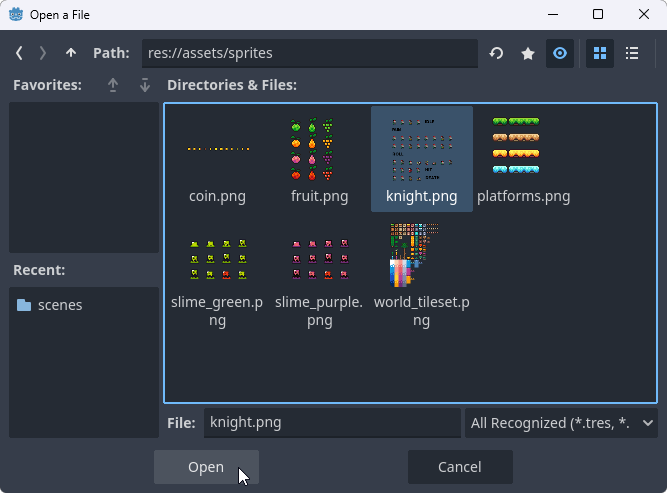
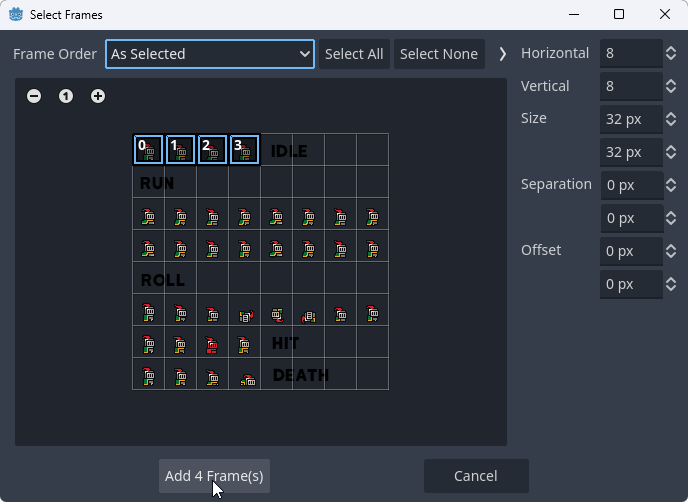
5. In the first window that opens, enter the assets/sprites directory and in the second window, open the knight.png file.
6. Change the "Horizontal" and "Vertical" values to 8. Select the 4 images in the IDLE line and click the "Add 4 Frame(s)" button.
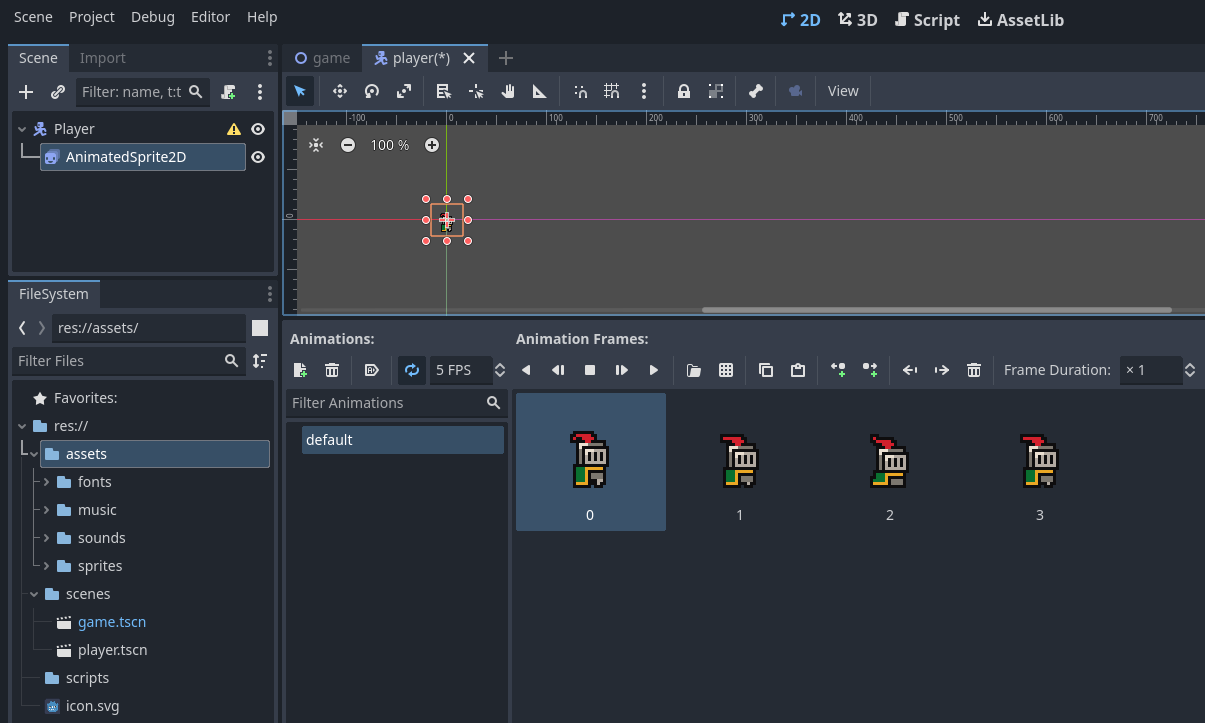
7. The development environment will be as follows.
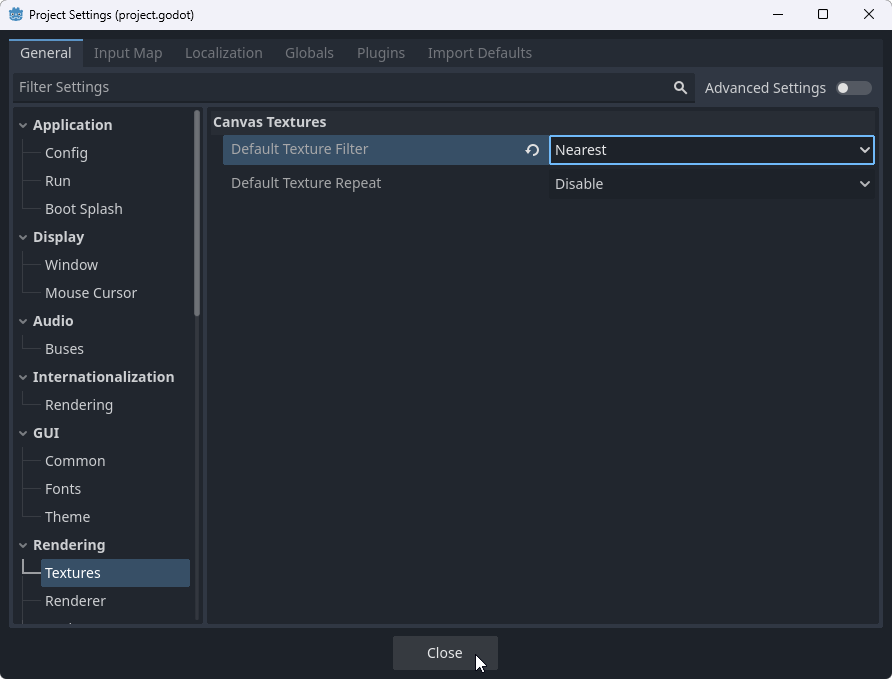
8. To increase the picture quality, open the window from the "Project – Project Settings" option in the main menu. Under the "Rendering" heading in the "General" tab, select the "Textures" option, and for the "Default Texture Filter" value, select the "Nearest" option from the box on the right and click the "Close" button.
9. While "AnimatedSprite2D" is selected and the picture is selected in the scene, change its speed to 10 FPS and its name from "default" to "idle". Click the "Autoplay on Load" button. Place the bottom border of the image on the horizontal line.
Now, we can play the animation with the Run button.
A warning sign is seen on the right side of the "Player" Node, indicating that it cannot collide or interact with other objects because it does not have a Shape.
Since the Player Node is a physical Node, it requires a physics engine to work. We need to create the Shape Node.
1. To add a Shape Node, while the "Player" Node is selected, click on the + sign under the Scene tab or the Ctrl-A key combination to create a new Node.
2. In the Create New Node window that appears, search for and select the expression CollisionShape2D in the Search line and click on the Create button.
3. While "CollisionShape2D" is selected, select "New CircleShape2D" from the selection box to the right of the "Shape" line in the "Inspector" tab. Reduce the circle created in the scene to the width of the image and set bottom border line to Player bottom border line.
When you define a shape, the warning sign on the right side of the "CollisionShape2D" Node will be removed.
4. While the "Player" Node is selected, under the "Inspector" tab, in the "Ordering" line, set the "Z Index" value to 5. Thus, the player is shown in front of all other objects in the game scene.
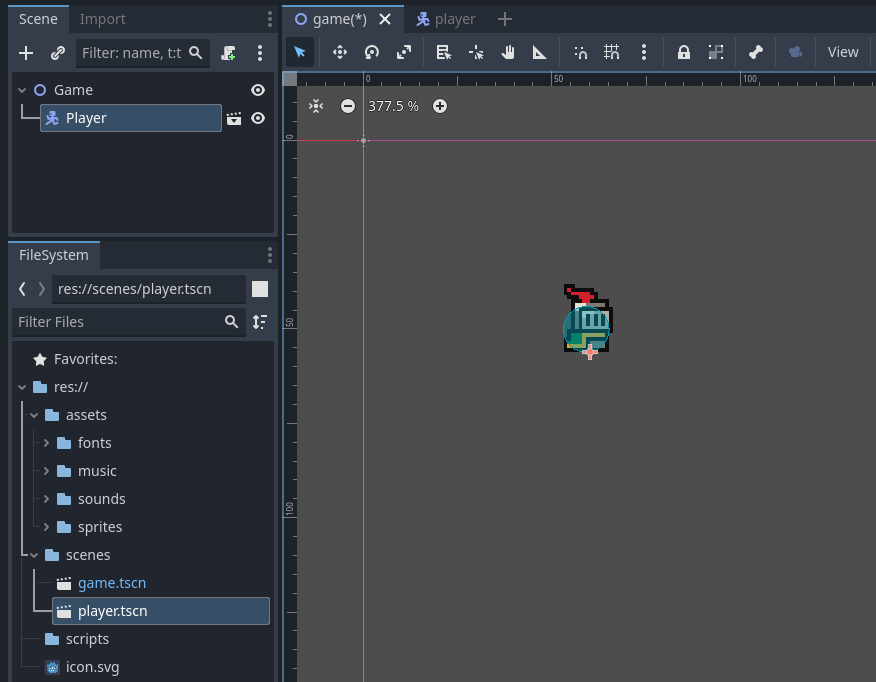
5. Switch to Game Scene. Drag the "player.tscn" file under the "scenes" directory from the "FileSystem" tab and drop it into the scene.
6. When we save the project with the Ctrl-S keys and run it with the "Run" button, we can see the Player moving in the main window.